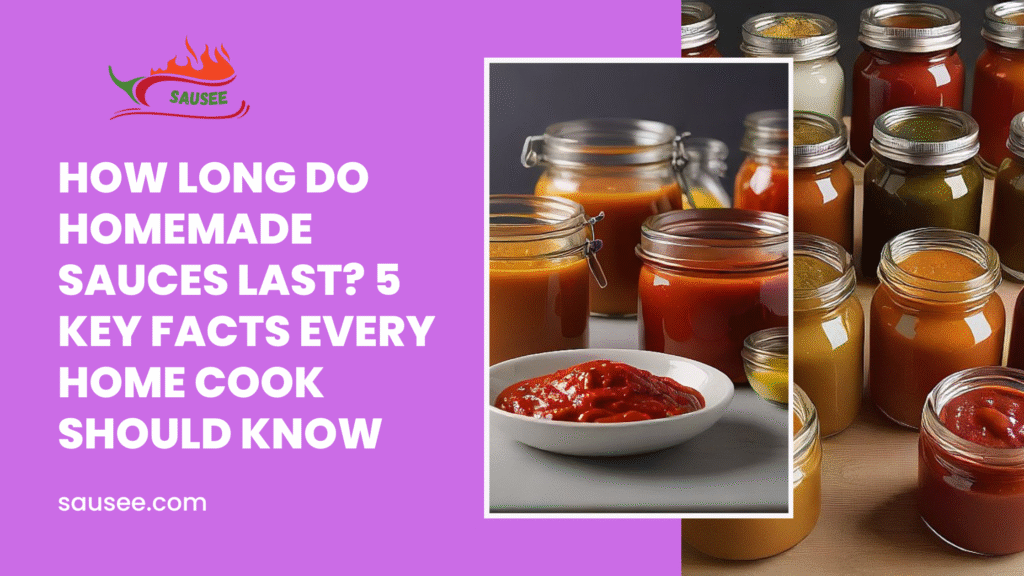
Table of Contents
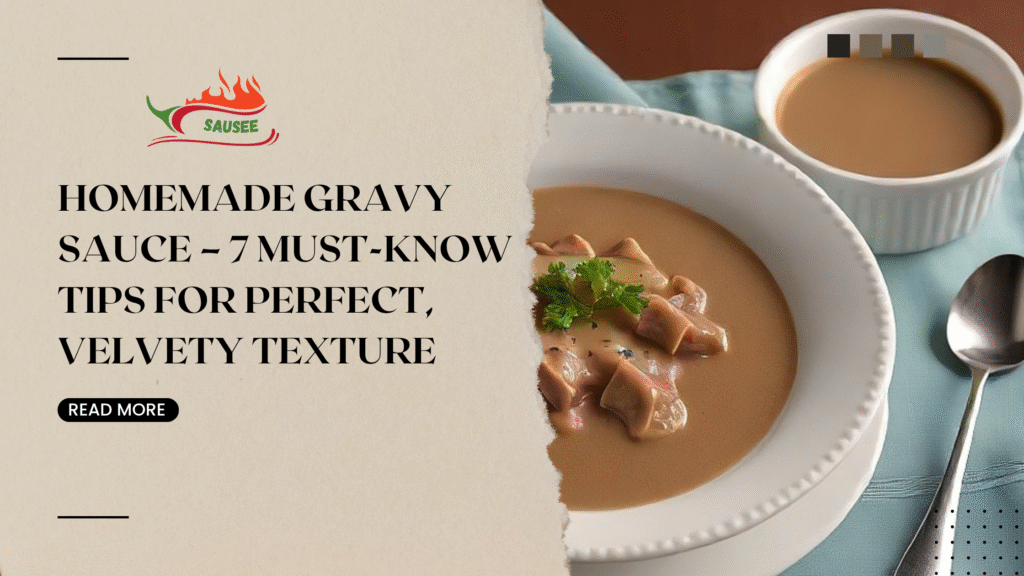
Introduction: Why a Good Gravy Sauce Can Make or Break Your Meal
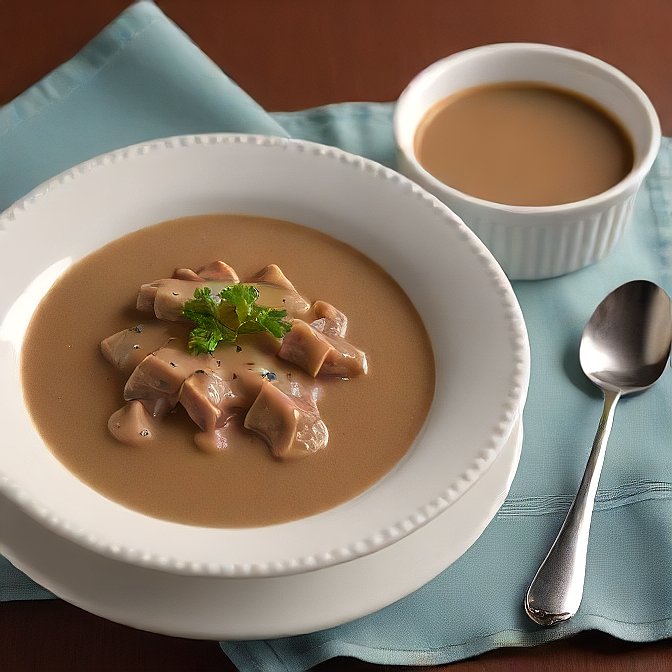
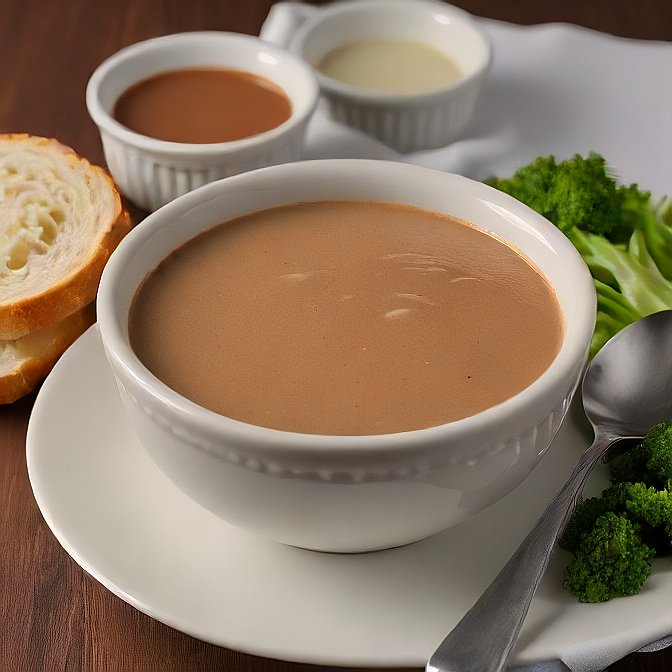
A homemade gravy sauce somehow seems magic with its deep and smooth qualities. It may be lightly poured over mashed potatoes, or poured over roast meat, or used to add zest to stuffing, but after all, gravy can make even a meal come into its own. When done properly, it is nature at her best, just when it is added to the dish, it gives a spurt of heat and flavour, the finishing touch that transforms the blandest of food into the special.
What makes a difference between a good and a great gravy? Not the taste only, it means the texture and consistency. The right thickness, free of lumps, the sauce can make a meal into a memorable experience. Nevertheless, a watery or thick, sticky gravy would sully other items on your plate.
Gravy is a very slippery ingredient, and most homemakers would have difficulty dealing with this. Even such insignificant errors as using excessive flour and a lack of stirring can be a recipe for a poor end-product. Example of the good news? It might sound complicated when it comes to mastering gravy, but it is easy once you are aware of what to watch out for.
In the post below, you will find 7 tips that must be tried so that you can get the right texture and taste of homemade gravy sauce, each and every time. You can’t prepare your own holiday feast or weeknight dinner like it’s served in the restaurant, and these tips will show you how to get restaurant food in your kitchen.
1. Start with Quality Drippings or Broth – Flavor Comes First
All great homemade gravy sauce begins with some kind of flavor base. Depending on what you are cooking your gravy on, be it roasted chicken, roasted turkey, roasted beef, or roasted pork, the base you get will define the rest of the sauce.
Why Roasted Meat Drippings Are the Gold Standard
In my experience, the best-tasting gravy is made using drippings that you find in the roasting pan once the meat is cooked. These drippings have fat and browned pieces (that are called fond) and extra concentrations of the roasting itself. Dissolved in a thickener and some liquid, they become a strongly flavoured sauce, and are difficult to surpass.
Your gravy, drippings bring:
- A characteristic meatiness and fatness just seem to flow out of this richness.
- Slightly caramelized taste: An exclusive quality
- When adequately mixed with fat and flour, it gives a glossy texture
When you roast and have a pan of golden drippings, do not waste the stuff–it is the gravy lover who wants it.
No Drippings? No Problem
Well, here is the deal: even in case you are not working with meat and roasting, and you do not have pan drippings at your disposal, do not get discouraged, because it is this very homemade gravy sauce that can be created with the assistance of broth or stock. Two of the decent alternatives are:
- On homemade broth or stock– A blend of flavourful and nutritious stock that is made by simmering bones, vegetables, and herbs.
- Quality store-bought stock – Buy low-sodium products to allow you to season to your taste
Secret tip: When you have store-bought broth, add some sauteed onions, garlic, and a little Worcestershire or soy sauce to build on a little more depth before you reduce it to gravy.
Deglazing the Pan for Extra Flavor
When using drippings, remember to deglaze the roasting pan. With this step, you are guaranteed every bit of flavor:
- Move the pan to the stove and put it on medium heat after having removed the meat.
- Pour in a splash of broth, wine, or even water to loosen the browned bits.
- Scraping the bottom of the pan using a wooden spoon or spatula.
- Put the stuff (that stuff) in your gravy base.
The deglazing is when you bring everything that caramelized in your pans to your sauce, making it so unbelievably complex and colored.
2. Choose the Right Thickener – Flour vs Cornstarch Explained
After coming up with an enjoyable taste of a base, the other factor in producing a perfect homemade gravy sauce is to thicken that flavored beauty to the desired smooth and velvety consistency. This is where opting for the right thickener will count.
Flour vs Cornstarch: Which One Should You Use?
Flour and cornstarch are widely used as thickeners, but how they each work in a sauce is different:
Flour
- Advantages: Makes a full-bodied, thick gravy of a creamy consistency
- Ideal to serve with: Simply made gravies to accompany roasts, mashed potatoes, and stuffing
- Cons: Usage needs to be cooked to get rid of raw flour flavor, a bit cloudier than cornstarch
Cornstarch
- Advantages: Gives a clear, shiny finish and thickens sooner
- It is best in light gravies or gluten-free.
- Cons: May go gluey when oversalted or used too much, and reheats poorly, unlike flour gravy
When to Make a Roux vs a Slurry
Thickening will vary according to which ingredient you utilize:
- Roux (used on a gravy that is made of flour)
- Roux is produced by adding equivalent amounts of flour and fat (such as butter or pan drippings) in a pan, and then liquid is added.
- It is the conventional way of making gravies that are thick and robust in flavor.
Make sure that the roux is cooked enough to some degree to eliminate the raw flour flavor. 1-2 minutes ought to be sufficient.
Slurry (for cornstarch-based gravy)
- Cold water is added to cornstarch, and the mixture is stirred until smooth and poured in a stream into hot broth or drippings that were whisked.
- It thickens fast and serves best when you are short of time to create a roux.
How to Avoid Lumps and Clumps
- The most ordinary is Lumpy gravy, which, however, is easy to avoid:
- This is because you need to add your liquid to a roux or your slurry to hot broth, and continually whisk.
- Before pouring, be sure that the slurry is thoroughly mixed (no dry powder in it).
- To an ingredient, add liquids slowly as opposed to together and mix well.
- In case some lumps are still evident, sift the gravy through a fine mesh sieve in order to smooth it.
Selecting the proper thickener and also utilizing it correctly will assist your homemade gravy to sauce to end up good, creamy, silky, and reflective.
Check Out: Hollandaise Sauce: 6 Must-Try Recipes for Eggs Benedict and Beyond.
3. Control the Heat – Slow and Steady Wins the Sauce
The fact is that one of the greatest tips to creating that smooth lump-free texture when making your gravy sauce is actually, do not hurry. Your approach to handling heat in the course of cooking is the thing what will determine whether your sauce will come out with the right consistency or not.
Why Medium to Low Heat Is Best
The gravy thickens slowly. When the thickening agents, i.e., flour or cornstarch, are put to do their work at a medium to low heat, the agents will create a smooth layer without burning. This presents you with:
- A velvet-like texture
- Ability to control the thickness more concisely, differentiating between the thicknesses
- Fewer chances of curdling or burning the sauce
The heat may be too high, and thus your sauce may thicken before being completely blended, or it may begin to stick and brown before soundly mixing.
Rushing the Process Causes More Harm Than Good
There are a few typical mistakes that may happen when the gravy is cooked too fast:
- Lumps: The excessively fast heat will cook the starch too soon before the complete dispersion of the starch has occurred.
- Separation: The fat can separate from the liquid in case it is heated too rapidly
- Scorching: The drippings or the roux might burn out and produce a bitter flavor
Slow down leads to better outcomes and will cause the flavors to mingle well.
4. Stir Constantly and With Purpose – No Walking Away
The only rule of thumb when making homemade gravy sauce is this: Never stop stirring. Although this might sound like a minor point, regular stirring is what makes the difference between a smooth gravy with no lumps and some gravy that is clumpy or even burned.
The Science Behind Constant Stirring
When flour or cornstarch is put into a hot liquid, the starch grains begin to swell and to absorb water. Without stirring it:
- Starch becomes lumpy as it lumps up together.
- The result: uneven thickening of the sauce
- The lower layers get burned before the rest has thickened
Stirring prevents the starch from settling anywhere in the liquid so much that it doesn’t evenly absorb into the liquid, giving it that rich, smooth texture.
Best Whisking Techniques for Lump-Free Results
The correct method of stirring will make it more effective:
- A balloon whisk or a flat whisk should always be used; these have more surface area than a spoon
- Stir figure eight style to get to every part of the pan, including corners
- Rake the bottom and sides to avoid sticking continuously.
- Do not stir too kindly, but agitate rather firmly, but in an even way
Wooden spoon. Simply use wooden spoons to taste, but do not use wooden spoons to thicken because they are not able to break up lumps, as a whisk can.
5. Season in Layers – Don’t Rely on Salt Alone
The homemade gravy sauce, when it is made right, does not just depend on salt to enhance flavour. Layered seasoning is the key to complexity and depth; another combination of herbs, spices, and umami flavors that are added over time to slowly build flavor as the sauce is cooked.
Flavor Builders Beyond Salt
Start thinking of seasoning as a toolkit, not a single step. Here’s how to expand the flavor of your gravy naturally:
- Herbs:
Placing thyme, rosemary or sage before the end of the cooking process provides flavor. Dried herbs are wonderful in longer simmers, and fresh herbs are effective in adding later on. - Spices:
Black pepper also gives some heat; a pinch of paprika or powdered garlic adds a low level of heat. - Umami Boosters:
Soy sauce, Worcestershire sauce, or a splash of meat drippings are all it takes to add salty richness without swamping the natural tastes.
These come in especially useful when using store-bought broth.
When to Season: During vs After Cooking
- During: Incorporate herbs and spices early in the process so that they have the opportunity to allow their aromatic taste to reach the sauce
- Save: Have finishing touches (such as salt, pepper, or a draught of soy sauce) to the end to adjust to taste
This helps you achieve control and avoids over-seasoning.
6. Strain for Smoothness – The Secret to Silky Gravy
Straining is the last step, but it also ensures the result will be smooth gravy with a restaurant-like texture, no matter how carefully you stirred and how good the ingredients you used were that time.
Why Straining Makes All the Difference
Gravy should also not be gritty. Sauces, even the most carefully made, may have:
- Little balls of flour or starch
- Pieces of herbs, spices, or meat juices
- Pan-cooked solids or thickener
Once it gets through the strainer, it will take all of that away and leave you with a professional-looking end product. It is either home-grown versus home-grown with delicacy.
Tools to Use: Mesh Sieve vs. Cheesecloth
One of these kitchen tools will allow you to strain:
- Fine Mesh Sieve
The easiest and the most popular. Just cover a bowl (or a saucepan) and pour in the gravy, allowing it to pass through the sieve with the aid of a spoon.
- Cheesecloth
Suitable for making very smooth sauces. Place a lined cheesecloth sieve on the top of your gravy bowl in order to trap the even smaller particles, particularly when you have fresh herbs or finely-crushed spices in your gravy.
Never use a colander or a strainer with large holes they do not get out lumps of any size or small pieces of the food.
What to Do with the Leftover Solids
- Forgive me! Don’t throw away those strained bits! They are not bland. And these are some of the intelligent zero-waste uses of them:
- Add to mashed potatoes with an even fuller savoury flavour
- Use as additional contents in stuffing or casseroles
- Stir into the soup stock to give a little extra flavoring
- Make the foundation of gravied meatballs or burgers
It might be a small step with a big effect as it transforms your homemade gravy sauce into another level of texture and appearance, and reduces food waste in your kitchen.
7. Finish with Fat – The Final Glossy Touch
After seasoning and straining your homemade gravy sauce, it has one last ingredient is added, which is fat to give it that luxurious velvety finish. It is that accoutrement of a pat of butter or a dollop of cream which adds either texture or taste to the food.
How a Knob of Butter or Splash of Cream Improves Texture and Richness
Fat is very important in the mouthfeel. A pinch of butter or cream:
- Balances out the tastes and smoothes out its harshness
- Gives a light lustre, which gives the gravy a rich appearance
- Provides a silkier, smoother finish that sticks gorgeously to your main dish
To make it richer and deeper in flavour, some cooks also add a few drops of the pan drippings at the last moment–even those who had not used them before.
When to Add Fats for Shine and Mouthfeel
Timing matters. Never put finishing fats during cooking, preferably at the last minute when the gravy has cooked to thicken and is then strained:
- Take the sauce off the fire
- Gradually mix in cold butter or cream so that it will not curdle.
- Stir thoroughly until it has melted and blended
In professional kitchens, one version of this technique (using butter) is called monter au beurre. It is easy, but it will take you to the level of a gourmet in sauce.
Conclusion: Master the Art of Homemade Gravy Sauce
Good food needs good sauces, and what better way to complete a dish than a creamy gravy with a homemade aromatic sauce. With an emphasis on quality ingredients, meticulous preparation, and one or two finishing touches that are the level of professional preparation, ordinary gravy will stand up as you will be proud to serve it.
Here is a brief recap of the 7 must-know tips:
- Begin with fattened drippings or a savoury crouton
- Select the thickener of your choice, which is flour or cornstarch.
- Deal with heat, even thickening up
- Stir continuously to achieve that silky smooth finish
- Prelayering season to add dimension and depth
- Professional-level texture strain
- These must end up with something fat to shine and a touch of luxury
These are minor (but mighty) moves that will make your homemade gravy go from simply okay to something fantastic.
Your turn is to cook up. Repeat, rework, and adorn your tricks; do not be afraid of experimenting with flavors and ingredients. Whether you are in the mood for a Sunday roast dinner, a holiday dinner, or find the need for a comforting dinner in the middle of the week, your homemade gravy sauce will be (or should be) never the same.
For more info: Click Here.
FAQs About Homemade Gravy Sauce
1. Can homemade gravy sauce be frozen?
Yes, one can freeze some homemade gravy sauce up to 3 months. Place the sauce in a container with a tight lid or a freezer bag, let it cool, and then place it in the freezer. To thaw, just put it in the fridge overnight, and then reheat the lumpy part on low heat as you stir with a whisk. To have the best results, freezing cream-based gravies is not advisable as they can be separated.
2. How do I fix gravy that’s too salty or runny?
- Too salty? To reduce the salt content, add a dash of unsalted broth, water, or cream. A bit of sugar or a few drops of vinegar would serve to equalize the taste as well.
- Too runny? Add cold water (about 2 tbsp) and cornstarch (about 1 tbsp) in a small bowl and whisk together to create a quick slurry, and add the slurry to the hot gravy by whisking. Boil on low heat till it thickens.
3. What meats work best with which type of gravy?
- Beef or lamb Beef or lamb: serve with a dark, flour-thickened gravy made of the pan drippings, augmented frequently with red wine or Worcestershire.
- Chicken or turkey: The drippings of the roasted fowl should be made into a light, buttery gravy to which a soup spoonful of cream or a pinch of herbs should be added.
- Vegetarian fare: Serve such foods with mushroom-based gravies or onion gravy over vegetable gravy.
- Pork: Tastes good with slightly sweet gravies- add apple juice or balsamic vinegar to taste.